
How to mark the source of a photo and image in the ITM editor?
Correct and clear sourcing of images
When creating interactive learning media, you will encounter the problem of where and how to credit an image source that you did not create yourself. You'll probably want to include it within the text or directly below the image. In this way, you will meet the conditions of correct source identification, but it is not the happiest choice. If there are more images, it can be confusing. With our editor you will solve this problem elegantly.
Procedure
For example, we will use a component called "Gallery 4". You can find it in the list of components under the "Gallery" tab. Among other things, this component will also allow you to indicate the source of the images.
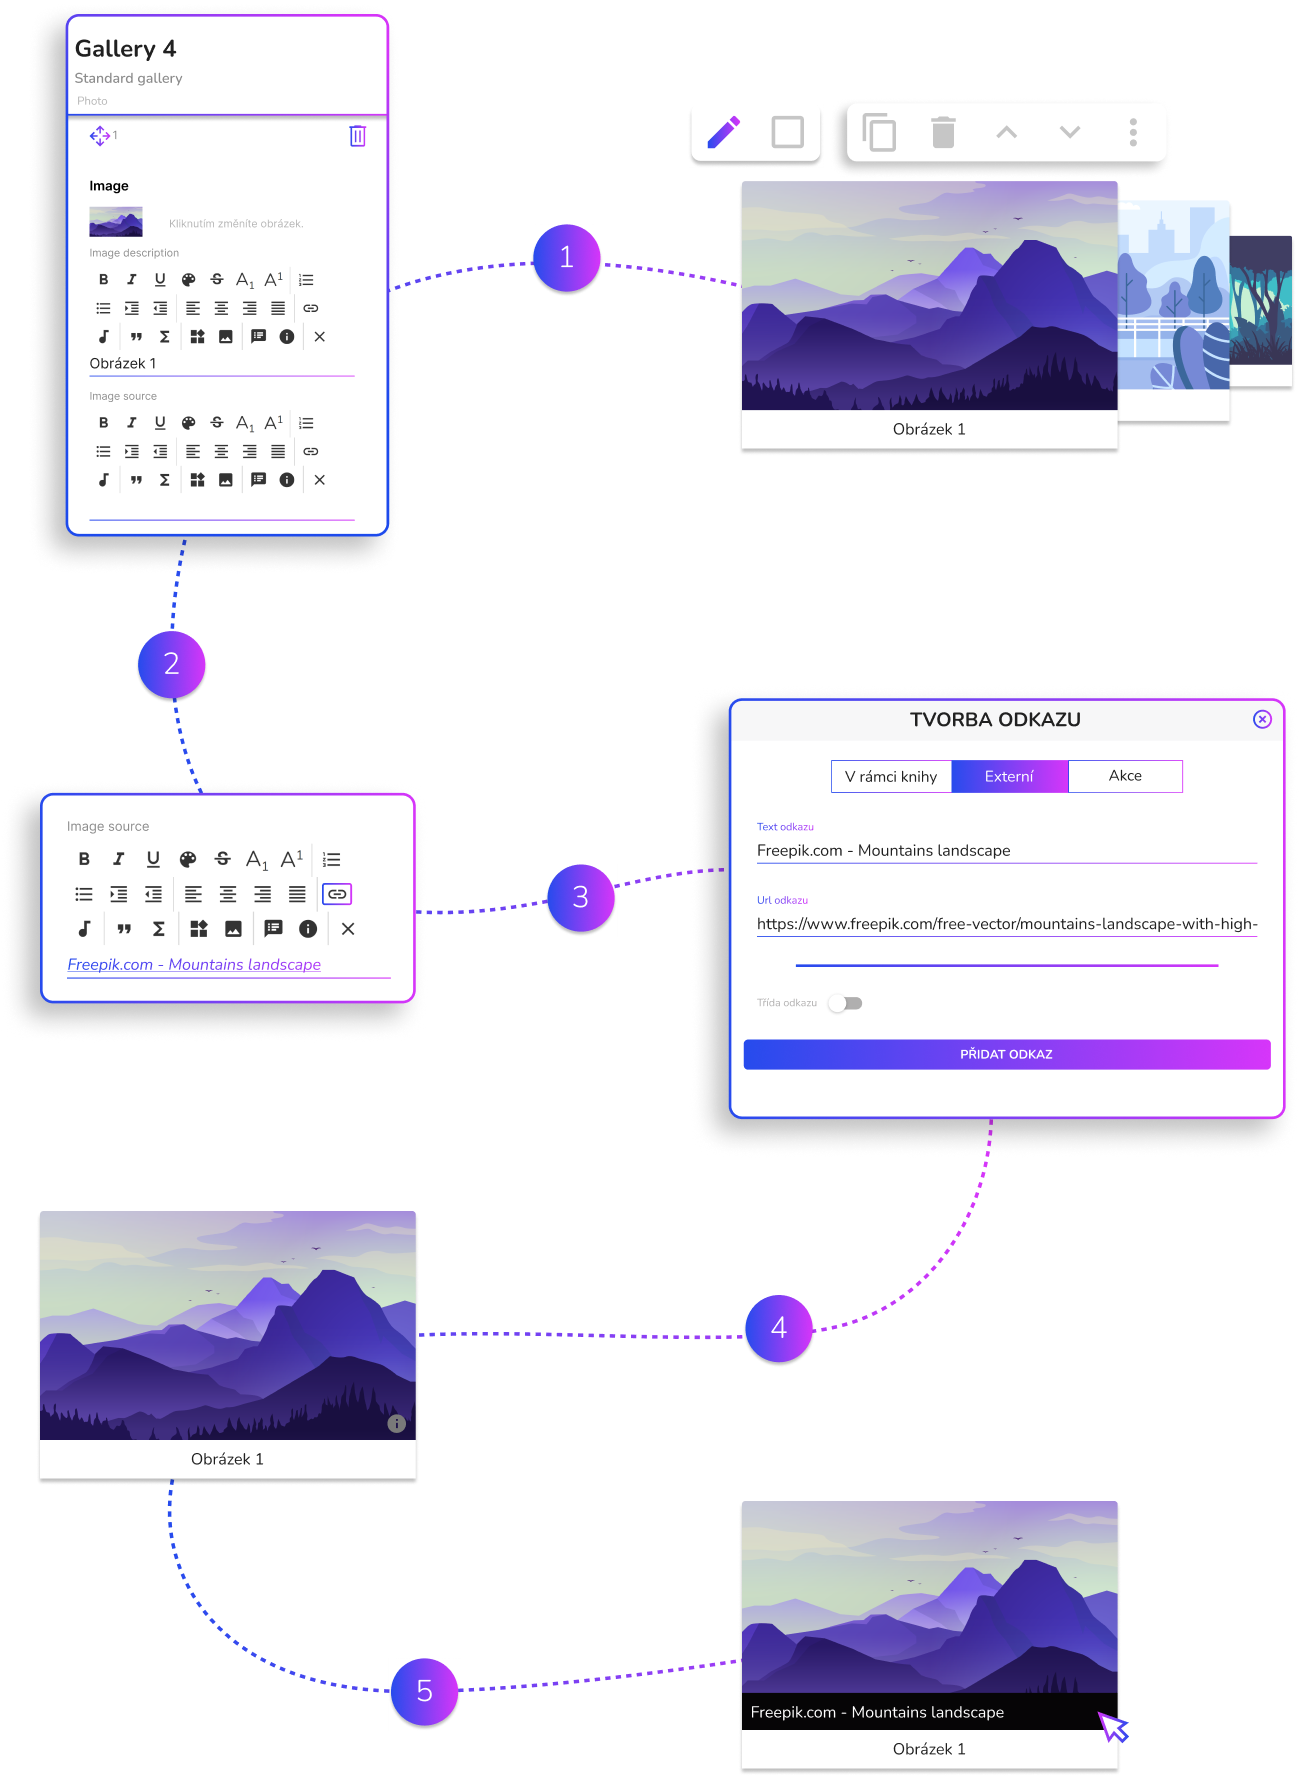
Step 1: Clicking the "Pencil" button will open the gallery settings tab on the left. Each setting section consists of an image (from the Media server), a label and the source of the image.
Step 2: The part for specifying the image source is called “Image source”. In the editor, you can include plain text or a link to the web page from which you took the image. You can make the text bold, use italics or set its color. If you want to insert just plain text as a source, skip to step 4. If you want to create a link as an image source, press the "Link" button in the text editor. This will open the "Link Creation" window.
Step 3: In the newly opened "Link creation" window, go to the "External" tab. Fill in the “Link Text” here, which is the placeholder text for the link that readers will see. For example, you can list “Freepik.com–Mountains landscape” here. Then fill in the "Link URL" field. You will redirect the reader to this link. The last step is to press the "Add link" button. This will insert the newly created link in the "Image source" field, which we wrote about in the previous step.
Step 4: By inserting the resource, an icon (round i) will be created in the lower right corner of the corresponding image. This represents the link just added.
Step 5: By default, only the icon (round i) is visible to readers and the feed remains hidden. As soon as the reader moves the mouse over the icon, the resource will be expanded in the lower part of the image. If it contains a link, the reader can go to the specified web page.
Other options
If the images are protected by a uniform license, it is not necessary to cite the source for each image separately. You can include information about the license in one place, for example under the imprint or the list of citations at the end of the book. You can also use this procedure in combination, where you indicate the source for some images and the rest will fall under the mentioned license. The last option is to number the images and indicate the source in the list of citations at the end of the book. You can simply refer to a specific image via a number.